

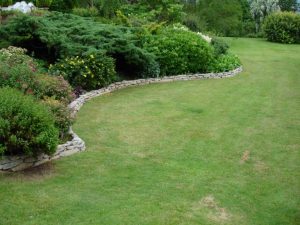
Source: Epoxy Floors Kelowna – If you are looking for a well planned and designed structure that can keep up the goodness of your outdoor garden, then a landscape retained wall is what you should look for. It is made suitable to place free standing on the one side and soil on other side. The concrete retaining wall looks great and quite creative too. It is made up of a good base material and strong base. However, it is very important to build a landscape retaining wall that is firm and strong. For this, using good quality materials and tools should be used for the construction.
Landscape retaining wall is built to a maximum of four inches in height. Above four inches requires permits from the officials from the local community. Landscape walls can be built in many ways using various materials and the landscape type. It can be built using any of the following materials such as interlocking concrete blocks, natural big stones, wood, old tires files with concrete, raw uncut rocks along with cut wall stones, colored concrete on solid block walls, dry stack or natural stones and even reusable artistic craft materials on solid block walls.
The concrete retaining wall heights vary depending on the purpose, landscape and cost availability. Sometimes wall are build as low as two inches to serve its purpose. More info can be found at Epoxy Floors Kelowna
How to build a 2″ landscape retaining wall
 A 2″ landscape retaining wall adds a great architectural value to your home space. It keeps the dirt from a sloping yard from going into the road or a driveway. It is unique in its own built materials and styling. The basic tools needed for this are fieldstone, leveler, work gloves, tape measure and a shovel.
Cost of building
The cost taken to build a 2″ landscape retaining wall is about 10 to 20 dollars.
Steps Involved
- First dig a trench into the soil for about 12″ or a feet deep. Create a level surface before you start to lay the stones.
- Tamp the soil with a soil tamper and level the base layer.
- Now it is time to lay the stones in to the trench. Place a layer of large stone at the base. This offers a good stability to the wall. For doing this you do not need any mortar.
- Stagger each stone joint as you lay them.
- Keep additional layers one by one.
- The top of the wall must be at the same level throughout. Use a leveler to check this.
- You can top the wall with crushed stones or stone toppers to give a unique style of your choice.
- Once the wall is built, it is optional to use a landscape fabric to protect the front wall from growth of roots from the inside.
- Fill with gravels and dirt and tamp them well.
- Now top it off with the top soil and plants.
- Create a quick flow draining using a draining tile if needed. Voila! The wall is ready!

